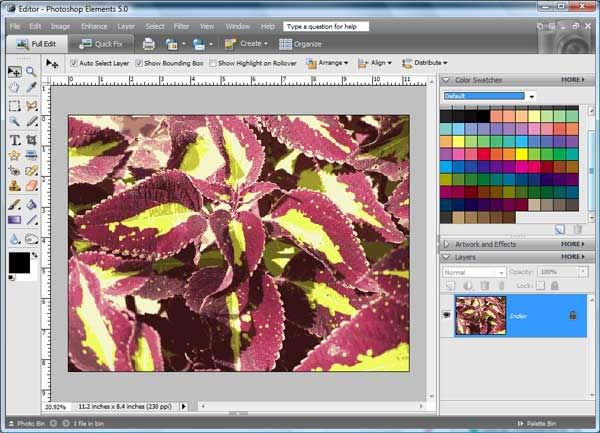
First step - open up the photo that you are scrapping and duplicate that photo to a new document and close the original. The process that will be described here atually alters the photo somewhat and this will prevent inadvertantly replacing the original photo. Also, verify that the Color Swatch window is visible. You can do this by Window --> Color Swatch.

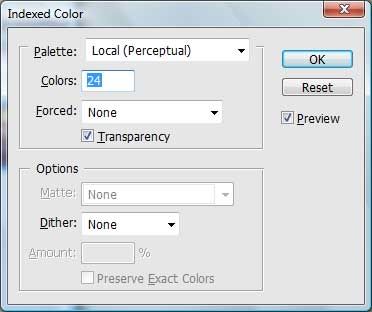
Verify that you are in fact in that new document with the copy of the photo. Now, click on Image --> Mode --> Indexed Color. By default this will display a Color value of 256. For me that is just too many colors to choose from, I typically find that 24 is much more to my liking.

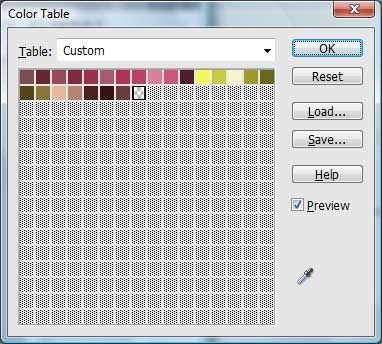
Here is the resulting Color Table.

Next, we will want to save that Color Table. I have a special folder where I save my color tables. To save the Color Table, click on Image --> Color Table --> Save. Navigate to your Color Table Folder. Notice that the extension on your fill will be .act

Now that we have the color table saved, we need to load it into the Color Swatches window. To do this, on the Color Swatch window, click on More --> Replace Swatches (the Load Swatch option will append your new color table to the existing one). Again, navigate to your Color Table Folder.

You will notice that the extension is .aco, change this to .act and your saved color table will appear.

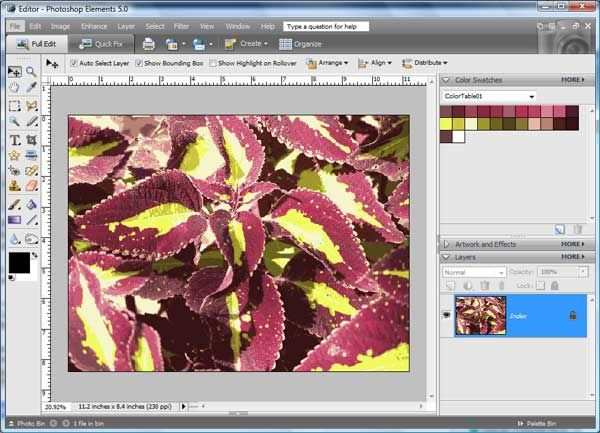
Click on that and notice that the swatch has now changed.

Close the document and do not save it. Open your new document and you are ready to create!!!
As a note, I have found it much easier to go back to the default color swatch if I have saved a copy of it in my Color Table Folder first. To do this, click on More in the Color Swatch window and Save. Navigate to your Color Table folder and supply the name Default.aco - after you are done with your current project, you can just replace the color table with the default.


1 comment:
Thank you so much for the fabulous ps tutorial on color tables!!
Post a Comment