In the past, I created CD calendars, but in recent years it has been harder to find jewel cases that are a consistent size and work well so it got frustrating and to be quite honest, when the case doesn't fit, the end product was less than professional. Well 2 years ago I got an idea one night when I couldn't sleep. At that point I thought about making 6x4 bragbook pages and using those to somehow create a calendar. I have used calendar bases from a number of designers over the years and always kind of struggled a bit with timing. So, one day I was just cruising the web and stopped in at Shutterfly to see what was going on. . .they have desktop calendars that use 6x4 photos!!! It just so happened that Friday Cindy Schneider came out with her calendar pack for the year. I got the wall calendar templates and then proceeded to modify those templates to fit in a 6x4 image. I have to admit, this will be the third year that I have used that same template pack!!! Sure wish she would come out with a new set, but I digress.
Each year, I picked a designer so there would be consistency over the course of the calendar. Last year it was Lliella Designs from Sweet Shoppe Designs and this year I selected Just So Scrappy as well as her Ooh La La Designs line. I don't know why I haven't shared this with you sooner, but it is definitely an idea that works well for creating a desktop calendar. Here's my process:
1) Create base pages. I create a base page for each month with a different "theme" as well as a cover page. Those are stored in a separate folder in PSD format since I use Photoshop.
2) Create individual folders. I have two girls and each girl gets a customized calendar with their kiddos so that means creating 2 sets of calendar sheets. I copy the pages from my base folder to these two folders again retaining the psd format.
3) Fill the individual pages. This takes a lot of time for me. . .locating photos and placing them on the calendar pages. And this is where retaining the psd formats become important!!! I may have to rotate the photo or reposition elements to accommodate the photo and subject nicely!!!.
4) Review. Once I get all the pages created, I generally take a break of a day or so and then come back and review them. If I am happy with a layout, then I save it as a 4x6 jpg at that point in the same folder that the associated psd is in.
5) Build the calendars. I go to Shutterfly and upload the filled 4x6 jpgs to individual albums. Then I pick the desktop calendar. I try to pick basic pages since I don't want the "calendar" to overshadow or conflict aesthetically with the "photo". Put the 4x6 jpgs into the correct months for the girls' calendars. I also create a calendar for my MIL and DH that contain a photos from each girls' calendar. On those, I actually add a caption that identifies the child and the event since my MIL will not know that.
6) Place your order. Now, I generally wait for sales. . .then place my order!!! Wella, a couple of weeks later I'll have my gifts in the mail!!!
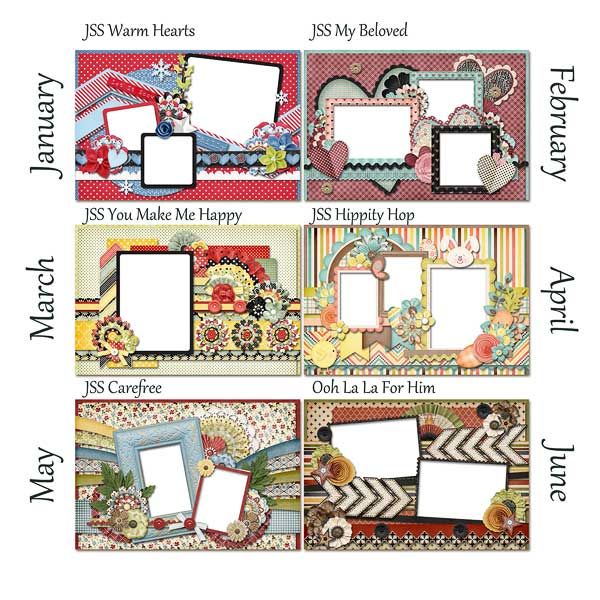
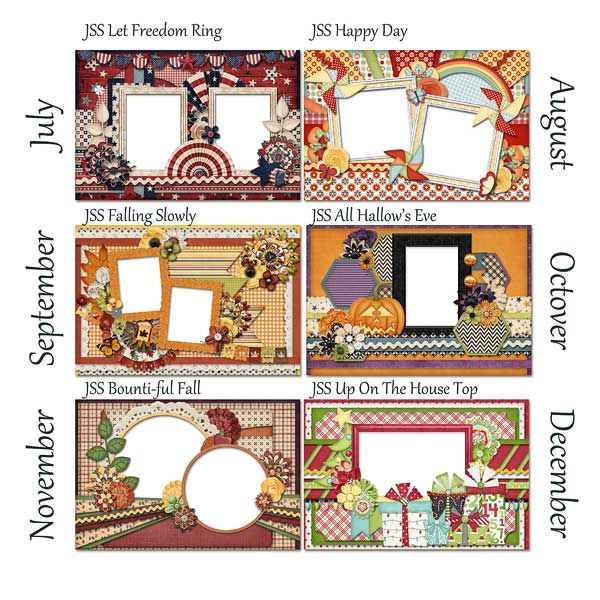
Thought I would share the pages with you so you can get an idea of what I have done. These are the blank pages along with the associated Just So Scrappy or Ooh La La kit that was used to create them . . .


1 comment:
These look so good Kabra! I'm sure they are greatly appreciated by all. I know calendars are always a welcome gift in my family!
Post a Comment